The Chemyx 10-Syringe Holding Rack expands the capabilities of the Fusion 200, allowing scientists to use up to 10 syringes simultaneously. The 10-Syringe Holding Rack can accommodate syringes with volumes from 1 μL to 10 mL. The rack can also be used with larger syringes (10 – 20 mL); however, only four such syringes will fit in the automatic syringe pump’s rack at the same time.
Attaching the Rack
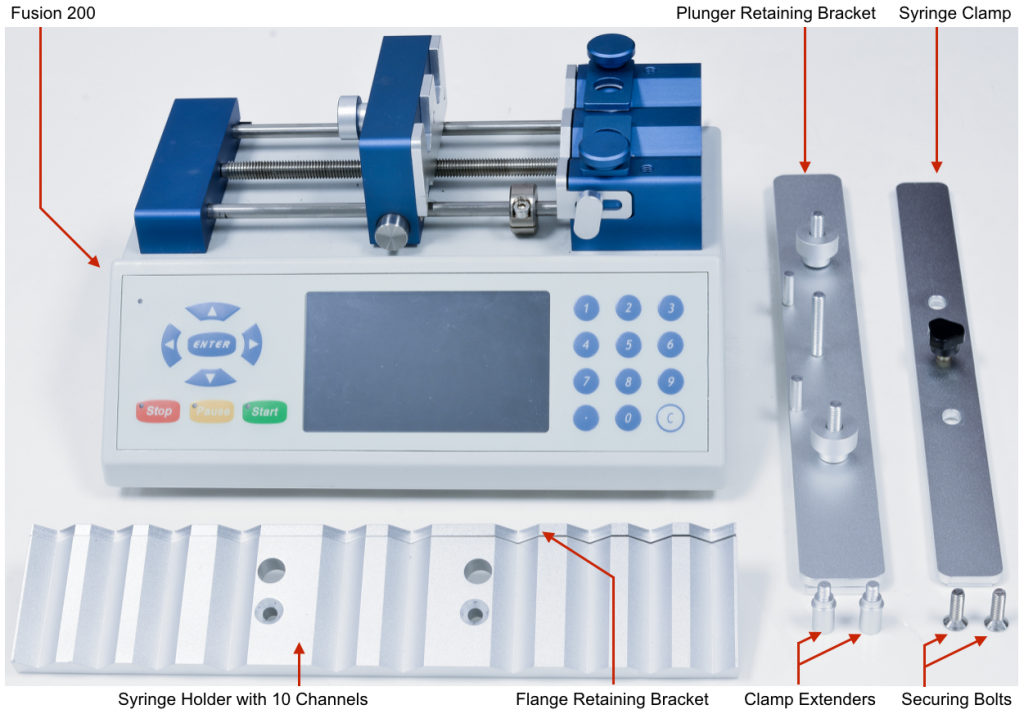
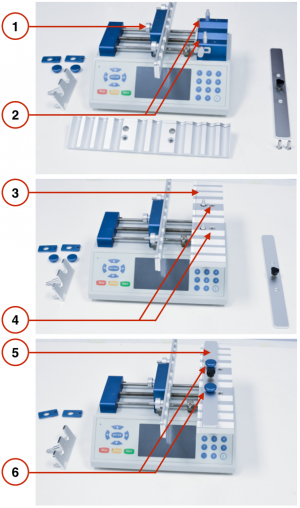
- Completely unscrew the bracket clamp knob for the plunger retaining bracket and remove the bracket. Replace the automatic syringe pump’s retaining bracket with the 10-channel plunger retaining bracket. Screw the bracket clamp knob back on and tighten to secure the 10-channel plunger retaining bracket.
- Completely unscrew the caps of the spring-loaded syringe clamps and remove the caps and clamps. Screw on the clamp extenders where the syringe clamp caps were.
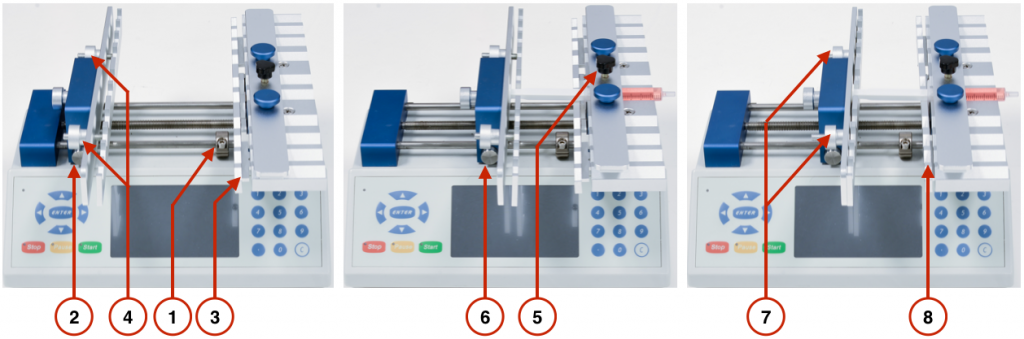
- Place the automatic syringe pump’s 10-syringe holder over the original syringe holder block (Note: The direction of the flange retaining bracket should be facing the pusher block). The extended bolts for the spring-loaded syringe clamps should go through the two untapered holes in the syringe holder.
- Place the securing bolts for the automatic pump’s syringe holder in the two tapered holes and tighten to secure the syringe holder.
- Place the 10-syringe clamp over the top of the 10-syringe holder. The extended bolts for the spring-loaded syringe clamps should go through the two holes in the syringe clamp.
- Screw on the blue syringe clamp caps on the extended bolts for the clamps.
Loading Syringes
- If necessary, move and tighten the automatic syringe pump’s infusion safety collar (see Adjusting the Safety Collar/Bar).
- While pressing the block-release button, slide the pusher block all the way to the left.
- Loosen the two wingnuts (underneath the rack) for the flange retaining bracket and adjust the bracket so that the flange of the syringe barrels will fit in between.
- Loosen the two bracket clamp knobs on the plunger retaining bracket and adjust the gap so that the plunger cap of the syringe may fit.
- Pull up on the spring-loaded syringe clamp bar and place a syringe in each of the syringes of the 10-syringe-holder block. Ensure that the flange of the syringe barrel is flush against the edge of the syringe-holder block (in between the bracket and the holder block). Slowly lower the syringe clamp bar to secure the syringe in place on the multi-channel syringe pump.
- Press the lock-release button and slide the pusher block to the right until it is flush against all of the syringe plungers. The plunger cap for the syringes should fit in the gap between the bracket and the pusher block.
- Tighten the bracket clamp knobs on the plunger retaining bracket to secure the syringe plungers in place.
- Move the flange retaining bracket flush against the flanges of the syringe barrels and tighten the bracket clamp knobs to secure the syringe flanges in place.